Mastering API Testing Automation - GitHub API and Postman in Action
- Why API Testing Matters?
- Understanding GitHub API and Postman
- Authenticating GitHub API Requests in Postman
- Building a Chain of API Requests with GitHub API
- Writing Tests in Postman
- Running the Entire Postman Collection
- Automating the Collection Tests
- Best Practices and Tips for GitHub API Testing
- Conclusion
- Acknowledgment
APIs (Application Programming Interfaces) play a critical role in modern software development, enabling seamless information exchange, and integration between different applications and systems. API testing is of utmost importance to ensure that endpoints, functionalities, and integrations perform flawlessly. In this blog, we’ll explore the significance of API testing and how it forms the backbone of a robust API development process. We’ll take a hands-on approach, using the GitHub API as our example, to guide you through building an automated API testing pipeline in Postman.
“APIs enable two software components to communicate with each other using a set of definitions and protocols.” — Amazon
Why API Testing Matters?
Customers are increasingly demanding reliable and fault-tolerance applications, especially in the highly competitive digital world. API issues can lead to service latency and unexpected errors, which can essentially damage customer trust, causing churn, and adversely affecting the business. It is crucial to build an application with API that is error-free and maintains high site reliability.
API testing is more than just bug identification; it fosters confidence among developers, testers, and stakeholders in the API’s intended functionality. By emulating real-world scenarios, API testing ensures your endpoints and methods can handle diverse inputs, leading to enhanced application reliability and performance.
Understanding GitHub API and Postman
GitHub API empowers us to perform a wide range of tasks, from creating and modifying repositories and branches to managing issues and pull requests, and retrieving repository data, among other functionalities. While certain publicly available information can be accessed without authentication, most resources and actions necessitate providing an authenticated token to execute API calls effectively. This makes GitHub API indispensable for integrating and interacting with GitHub’s features and data.
Postman is an API platform for building and using APIs. Postman simplifies each step of the API lifecycle and streamlines collaboration so we can create APIs efficiently. It provides a user-friendly interface to interact with the server side and send requests with just a few clicks.
Authenticating GitHub API Requests in Postman
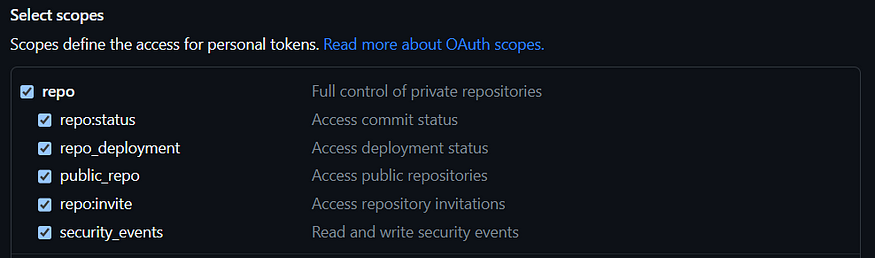
To begin with Postman, you can install the Postman application or utilize the browser version. Before proceeding, it’s essential to set up a personal access token for GitHub API. You can find details on managing the token here. For this specific use case (creating & deleting a repository), granting the \(repo\) and \(delete_repo\) scopes to the access token are necessary.

Once we’ve generated the GitHub API access token, we can proceed with configuring the Postman interface settings. Below are the steps to set up our first authorized API request:
- Create an Empty Collection
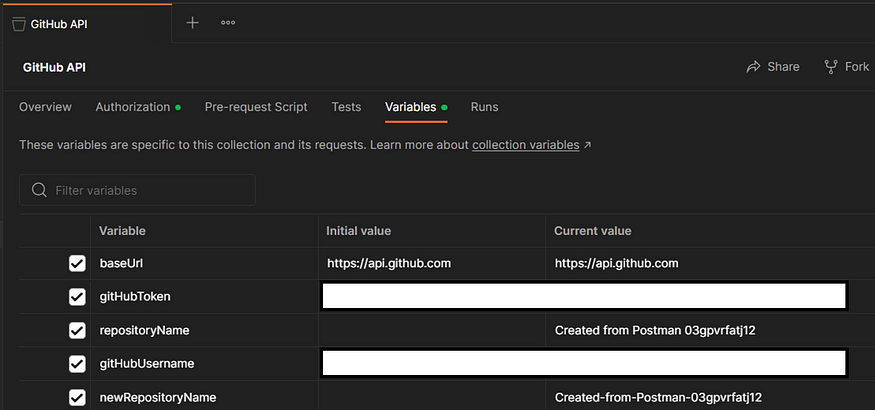
- Configure Collection Variables
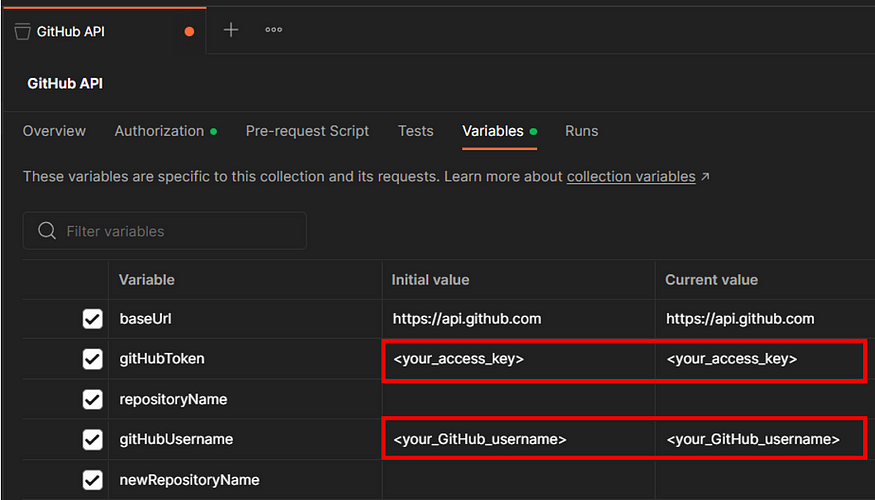
- Remember to configure the corresponding GitHub access token and username for both the initial value and the current value.
- Initial values are shared when you share a collection or environment. Current values are local and not synced or shared.
- In the later section, we will create a Postman collection monitor to execute the scheduled API requests. Since we need to grant Postman permission to access our GitHub account, we need to configure both values (Initial & Current).
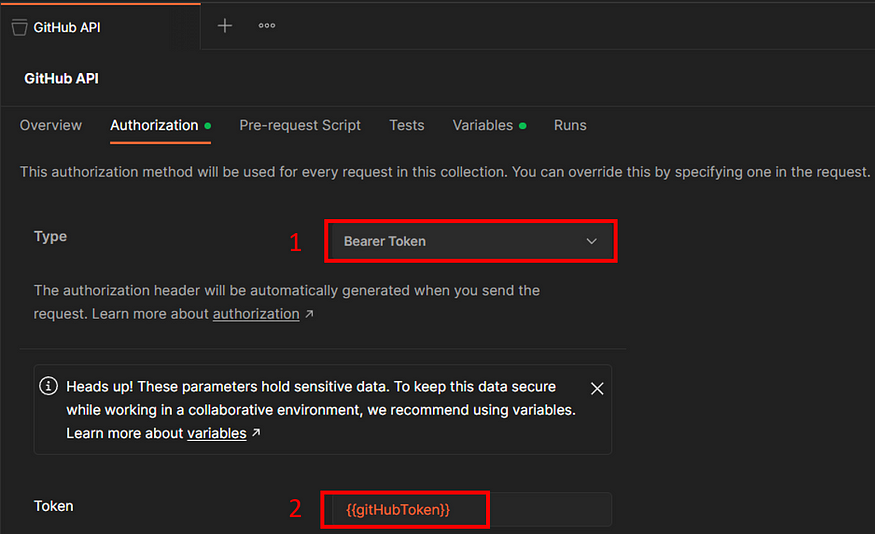
In order for all the requests under the collection to be authorized, we will need to (1) set the collection authorization type as bearer token and (2) use our previously created variable \(gitHubToken\) as our token.
- Create & Authenticate our 1st API Request
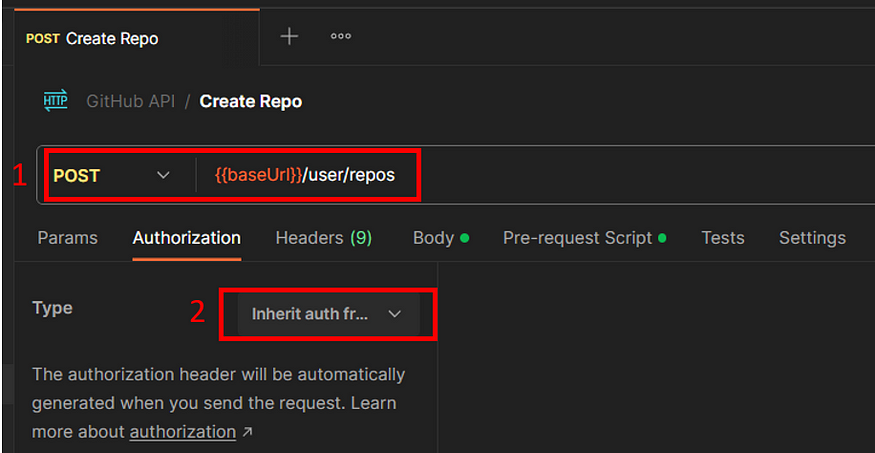
Our 1st API request will be creating a repository under our GitHub user account.
(1) Select a POST method, and set the URL as {{baseUrl}}/user/repos , this is our endpoint for creating a repository for the authenticated user.
(2) In the authorization tab, set the type as Inherit auth from parent, this will inherit the authorization from our collection.

{
    "name": "",
    "description": "<Input_your_desired_description>",
    "private": true
}
(3) Write the JSON body, as name is the required field for creating a repository. Some common optional parameters are description and private.
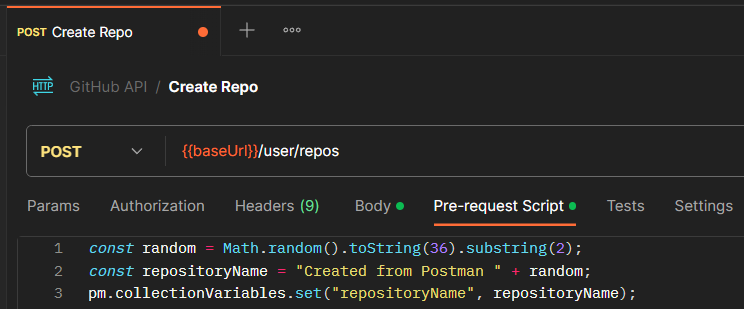
const random = Math.random().toString(36).substring(2);
const repositoryName = "Created from Postman " + random;
pm.collectionVariables.set("repositoryName", repositoryName);
(4) We will use pre-request Javascript to generate a repository name repositoryName each time when we trigger this API request and store it as one of the collection variables for future use. You may change the prefix and suffix as desired.
pm is a Postman library in Javascript, we will use it to operate with all the Postman variables, including collection variables.
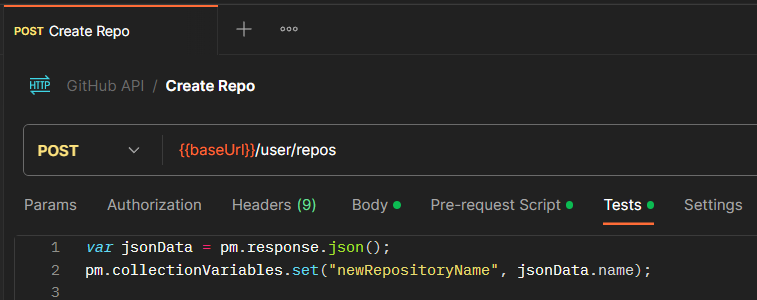
var jsonData = pm.response.json();
pm.collectionVariables.set("newRepositoryName", jsonData.name);
(5) Since GitHub will automatically replace all the whitespace with “-”, we will store the response repository name from GitHub into Postman collection variables named newRepositoryName.
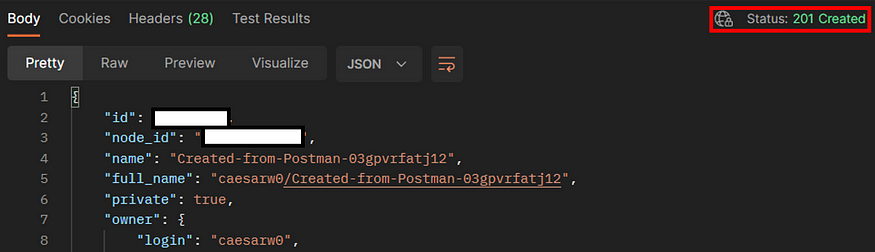
After configuring all the required parameters and API request details, we can send the request, and it will return the status 201 Created.
The Postman collection variables are also defined automatically. The incoming response will be in JSON format, containing relevant information such as the repository name, user name, and more.
Congratulations! We have successfully created and executed our first authorized GitHub API request.
Building a Chain of API Requests with GitHub API
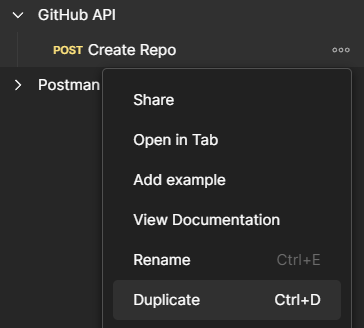
Now that we have successfully created our first GitHub API request, you can follow similar steps to create additional requests or duplicate the existing one, adjusting the URL, parameters, and methods (GET, POST, DELETE).
Deleting a GitHub Repository
Next, let’s explore how to delete the repository we just created. As mentioned earlier, we already stored the repository name in a variable, allowing us to easily specify the target repository to be deleted. This way, you can efficiently manage various operations on repositories and interact with GitHub API seamlessly.
Let’s duplicate our previous API request.
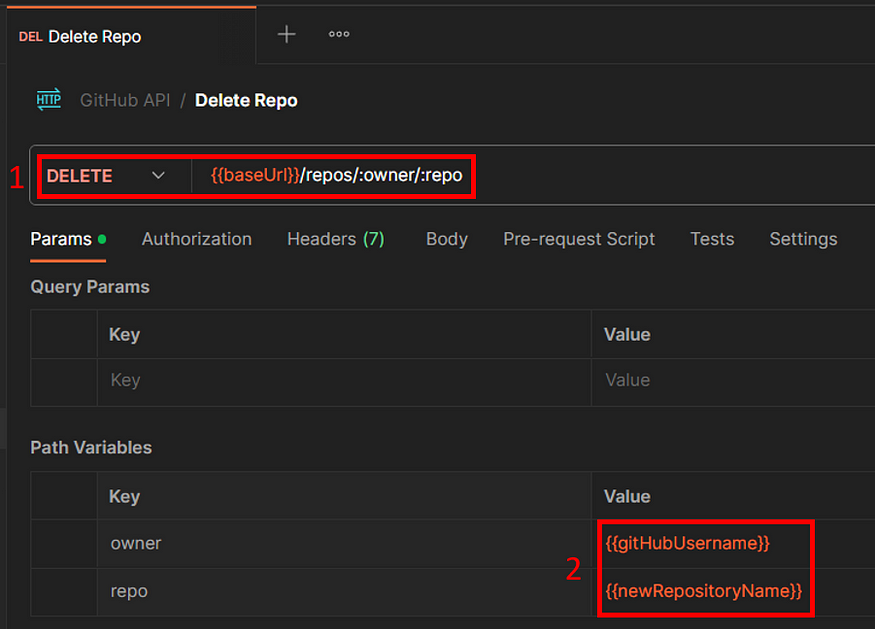
(1) Rename the request, select the DELETE method, and specify our Url as {{baseUrl}}/repos/:owner/:repo . The string followed by a colon is a Postman short key for path variables.
(2) Configure our path variables with our pre-defined Postman collection variables (GitHub username and repository name).

We can test our delete repository request, and if it returns a 204 No Content , it means we have successfully deleted a repository under the GitHub account specified.
Verifying the Deletion of the Target Repository
After deleting the repository, we can check our GitHub account and see if the target repository exists or not.
Let’s duplicate our previous API request.
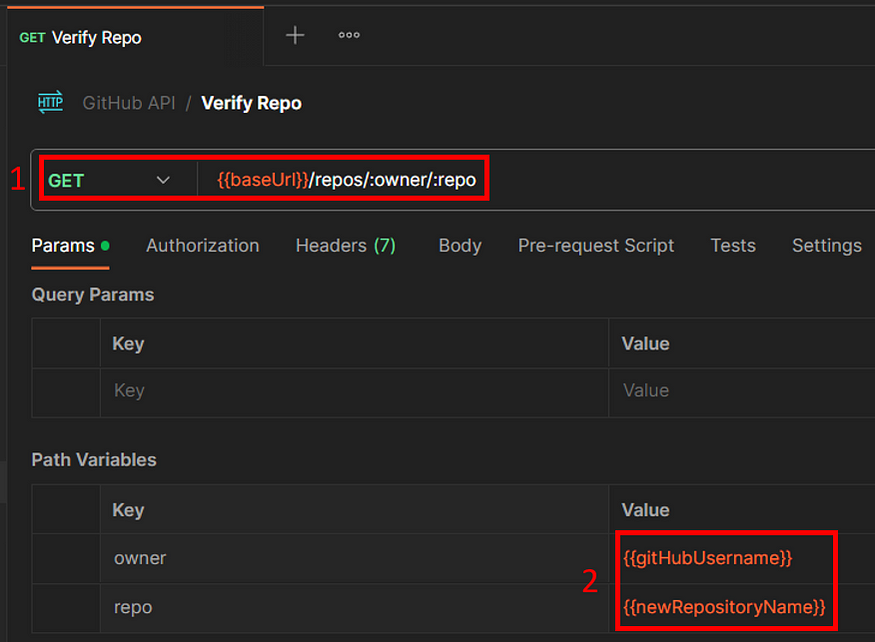
(1) Rename the request, select the GET method, and specify our Url as {{baseUrl}}/repos/:owner/:repo .
(2) Configure our path variables with our pre-defined Postman collection variables (GitHub username and repository name).
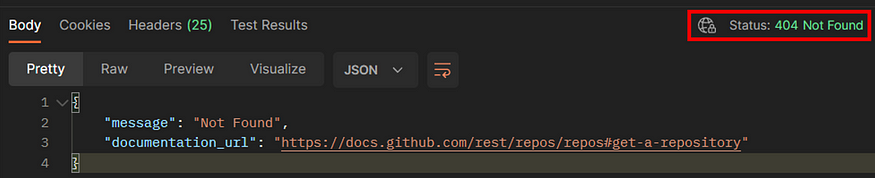
If the target repository newRepositoryName is successfully deleted, we are expecting to receive a 404 Not Found response from GitHub.
Writing Tests in Postman
Now that we have completed writing all the API requests, we are ready to proceed with writing tests for each of the three requests.
Writing Tests for Repository Creation
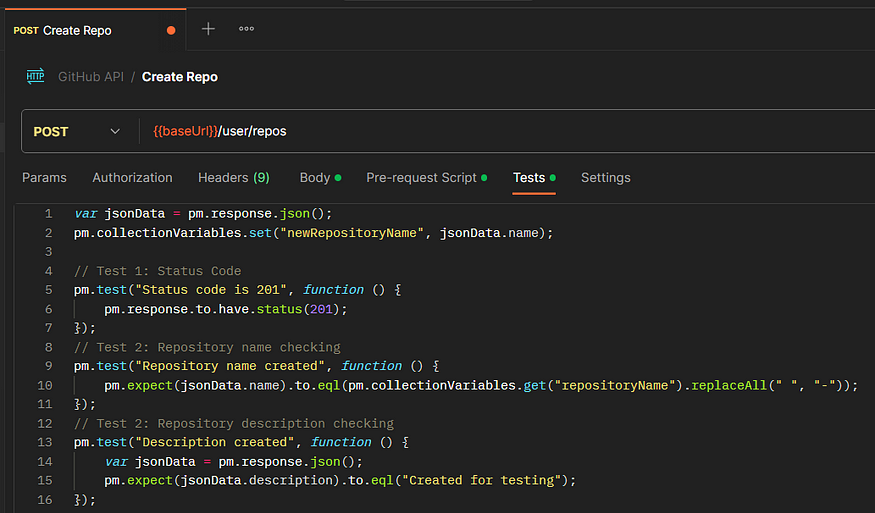
var jsonData = pm.response.json();
pm.collectionVariables.set("newRepositoryName", jsonData.name);

// Test 1: Status Code
pm.test("Status code is 201", function () {
    pm.response.to.have.status(201);
});
// Test 2: Repository name checking
pm.test("Repository name created", function () {
    pm.expect(jsonData.name).to.eql(pm.collectionVariables.get("repositoryName").replaceAll(" ", "-"));
});
// Test 2: Repository description checking
pm.test("Description created", function () {
    var jsonData = pm.response.json();
    pm.expect(jsonData.description).to.eql("Created for testing");
});
Under the test section, we can create 3 tests for testing the status code, repository name, and description value.
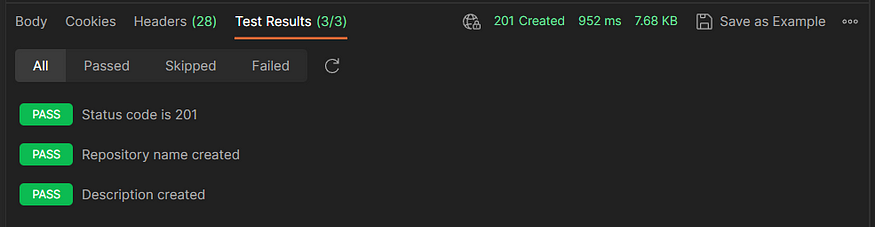
If the tests are passed, we are expecting to see the following results.
Writing Tests for Repository Deletion
According to the GitHub API documentation, the expected response upon successful repository deletion is status code 204. Therefore, we will include a test for this specific status code to indicate the repository is removed from the GitHub account.
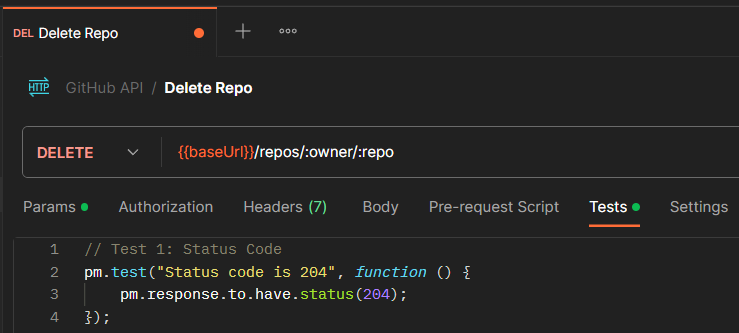
// Test 1: Status Code
pm.test("Status code is 204", function () {
    pm.response.to.have.status(204);
});
After the repository is created from the previous API request, we can trigger the repository deletion immediately to remove this repository as the current Postman collection has stored the repository name in this example.

Writing Tests for Repository Verification
Similar to deleting a repository, we are expecting a certain status code after calling the API requests. Since the repository is already deleted from the previous API call, we will be getting a 404 Not Found response as the repository does not exist in our account anymore.
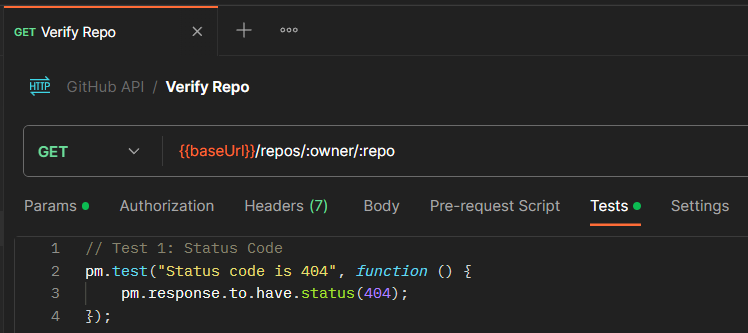
// Test 1: Status Code
pm.test("Status code is 404", function () {
    pm.response.to.have.status(404);
});
The test for verification is the same as the repository deletion test, we are expecting the API response to be a specific status code (404 in this example).
Running the Entire Postman Collection
The Postman Collection Runner allows us to run a collection’s requests in a specific sequence. This enables functionality testing seamlessly without manually calling the API requests one by one. The Runner also logs the test result and offers the flexibility to pass data throughout the workflow.
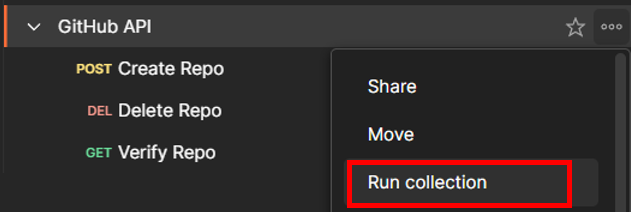
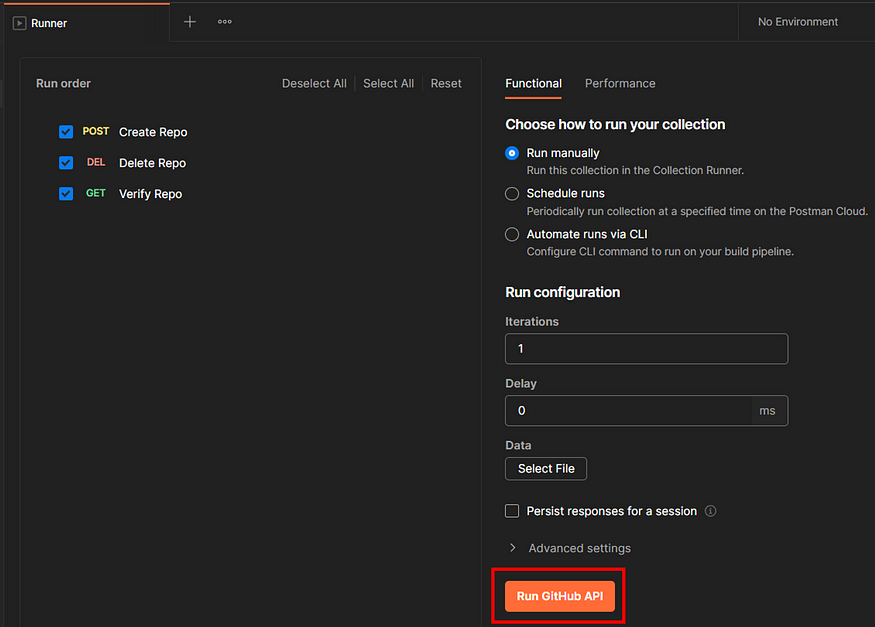
For testing purposes, we will use the default settings and manually run our collection. One thing to note is the run order of our APIs, it should be Create Repo → Delete Repo → Verify Repo. Otherwise, the tests will fail.
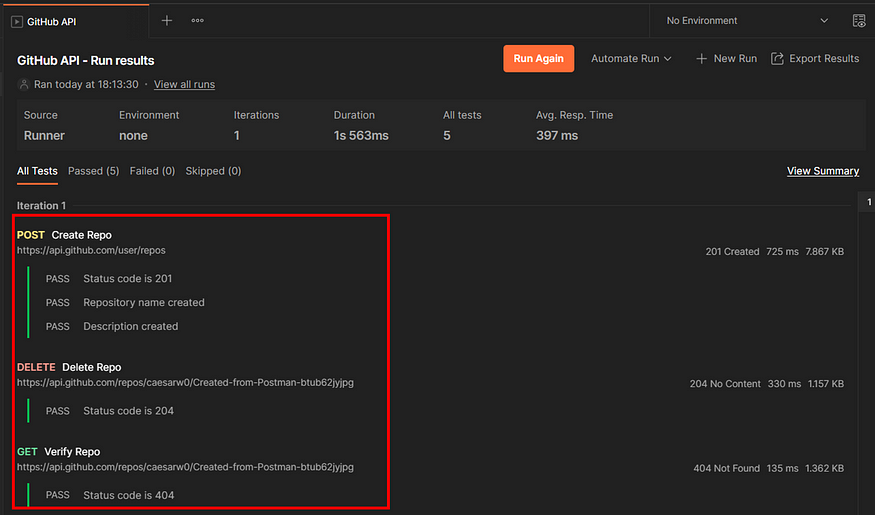
As we can see from the result above, all the test cases are passed as expected.
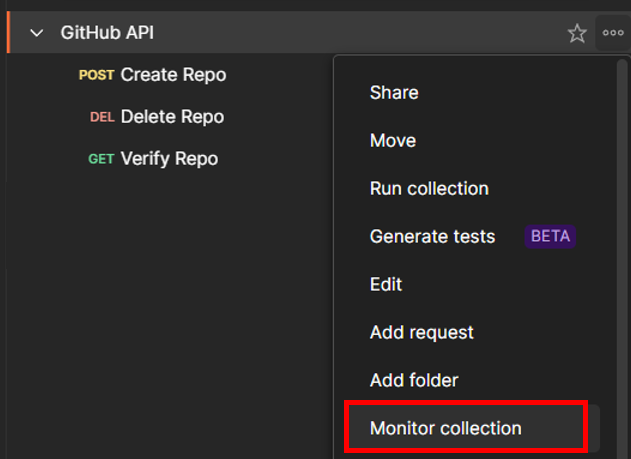
Automating the Collection Tests
In order to automate our collection runner, we can use monitor collection to schedule collection runs and stay informed of any issues.
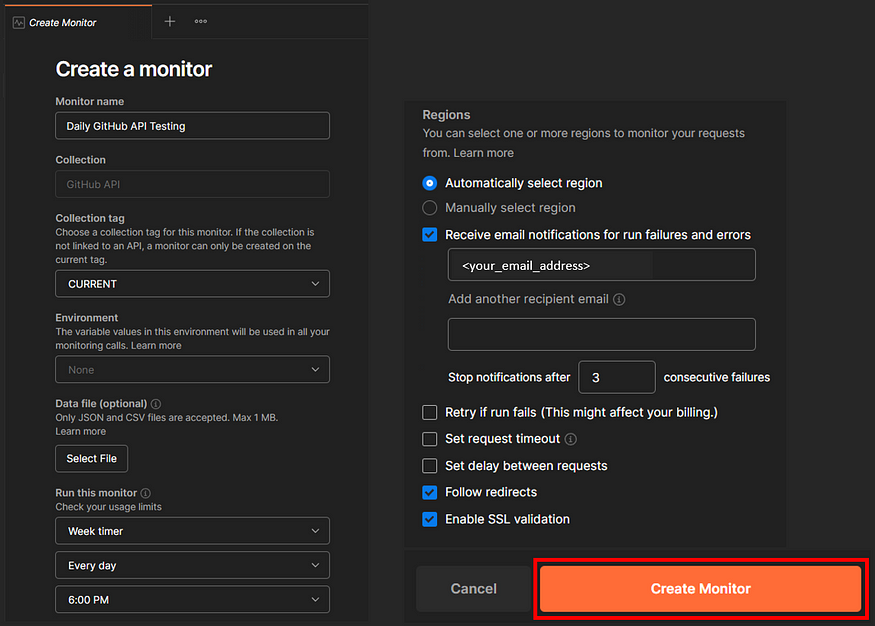
For testing purposes, we will use the default settings. Feel free to give a meaningful name to the monitor and specify the email address for notifications.
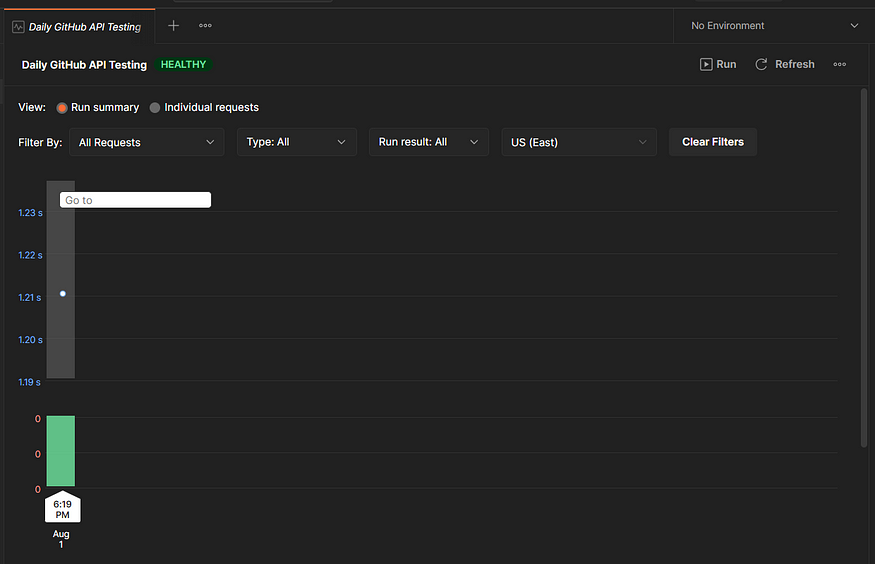
The above interface shows the health status of our collection monitor. We can manually trigger the monitor for testing purposes. After a few days, we will see a run summary for each day in this interface.
If there is any failed run, we will receive an email notification (if we checked the receive notification box).
Best Practices and Tips for GitHub API Testing
- Utilize Variables for Easy Configuration: When setting up your API requests in Postman, leverage variables to enhance flexibility and maintainability.
- Optimize with Collection Variables: For variables that need to be shared across the entire collection, consider using collection variables. Changes made to collection variables will automatically apply to all requests within the collection.
- Set Base URL as a Collection Variable: When multiple API requests share the same base URL, it’s best practice to set it as a collection variable.
- Verify Response Messages and Status Codes: Always inspect the response messages and status codes for each API request to identify potential issues. In case of any failed API requests, these details will provide valuable hints and insights into the problem.
By following these best practices and tips, you can streamline your API testing process in Postman and ensure a robust and effective API testing strategy for your development workflows.
Conclusion
Throughout this blog, we explored the world of API testing with Postman, utilizing various features to enhance our testing practices. From setting up API requests with variables to leveraging the collection runner and collection monitor for comprehensive API testing, we’ve covered essential techniques to streamline your testing workflow.
By following the best practices shared in this blog, you can effectively validate your APIs, identify potential issues, and ensure seamless integration with GitHub API. We encourage you to explore and experiment with other APIs, applying the knowledge gained from this blog to create efficient and effective API testing pipelines.
Acknowledgment
The detailed GitHub API testing on Postman materials is referenced from the Postman YouTube series.
Note: The same blog is posted on Medium.
Share on: